


In my previous article, I wrote about how to create a local repository. By local I mean, a repository which hasn't been pushed online yet.
This is the time I'd ask, hope you enjoyed my last article (series 1 :)), if you've not read it, I advise that you should as this is a sequel to it.
Here's the link:
Baby Steps to Git and Version control - Series 1
Getting Started
If you want to keep track of your code locally, you don't need to use an online repository. But if you want to work with a team, you can use GitHub, Gitlab or bitbucket to collaboratively modify the project's code.
What we'll cover:
- Creating a remote Repository
- Syncing your remote repository to your local repository.
- Updating your git repository (local and remote)
Creating a Remote Repository
By now you should have created an account with any of the version control software, of which we'd be using GitHub for this article. Visit github.com to sign up if you do not have an account already.
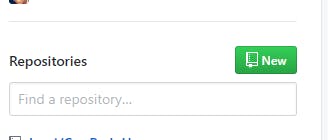
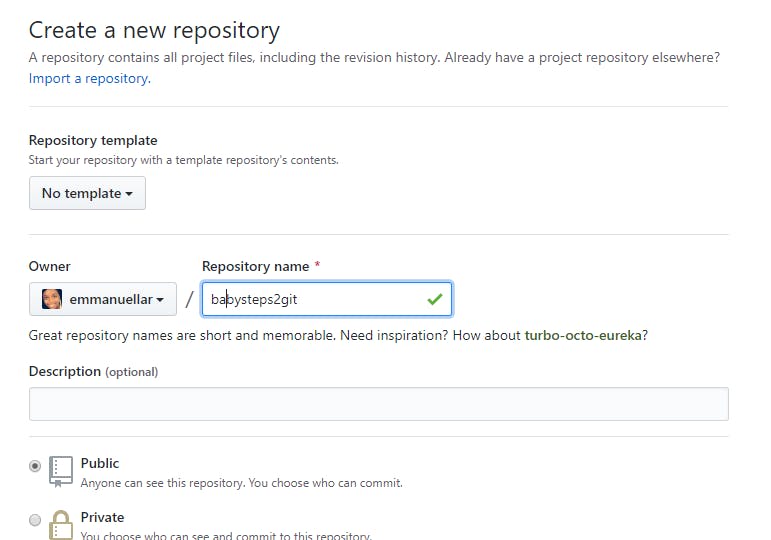
To create a remote repository, go ahead and click on New button (I'm not a Github first time user so you'd probably see a green Create Repository button on yours instead)
Whichever way, it'd take you to the page where you enter the name of your repository and a description of your project. It also gives you the option to make your repo private or public. You could also initialize your repo with a read me by ticking the read me check box.
Syncing your remote repository to your local repository
Now we've created our remote repository, we have to sync it with our local repository so they both can seamlessly communicate. Open up your git bash, navigate to the folder you're working on and enter the following codes git remote add origin url

Updating your git repository (remote and local)
Lets go ahead and add some codes to our html file
                  <label for="inputEmail" class="sr-only">Email Address</label>
                  <input type="email" class="form-control" id="inputEmail" placeholder="Password">
           </div>
As we learnt in the previous series, we have to run the following lines of code:
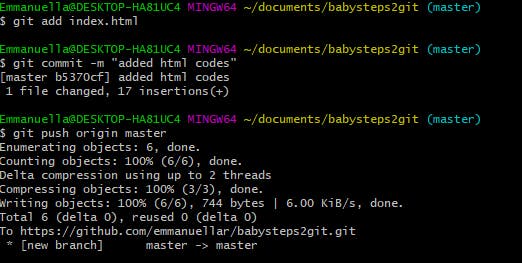
git add index.html
Go ahead and commit
git commit -m "added some html codes"
As it is, our local repository is currently a commit ahead of the remote repository. To update the remote repo, we'll have to push our work from the local repository to the remote repository using the code:
git push origin master
"master" is the default branch for every repository and most times houses the main project codes.
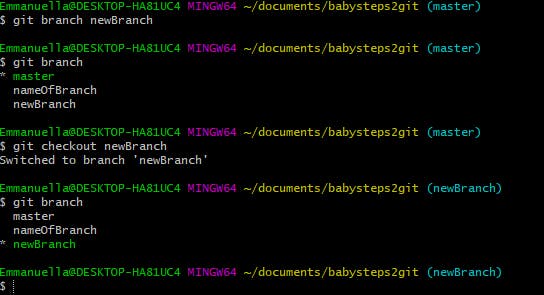
You can also choose to create a new branch assuming you made a new feature but you are worried about making changes to the main project (master branch)
You can use the code: git branch newBranch to create a new branch, and use git checkout newBranch
The above codes can be combined as git checkout -b newBranch
You can use git branch to confirm the branch has been created. The branch name with asterisks next to indicates which branch you're pointed to at a given time.
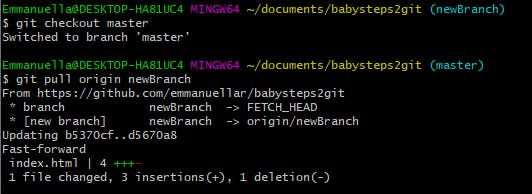
To update the main project branch (master branch) with the contents of the new branch, checkout to the master branch and run:
$git pull origin newBranch
This updates the master branch with all the changes implemented on the newBranch branch.
When you push to the remote repository, GitHub will automatically create the branch for you on your remote repository. This allows people to see the changes you've made.
What does "origin" mean?
Origin is a shorthand name for the remote repository that a project was originally cloned from. More precisely, it is used instead of that original repository's URL - and thereby making referencing easier.
So to push your changes to the remote repository, you could use either of the following command
git push origin nameOfBranch or git push github.com/username/reponame.git nameOfBranch
(You could be prompted to enter your username and password. Note that your password won't show as you're entering it. Just enter them correctly an hit enter)
That's all for now folks!!! In my next article, I'll be showing you how to collaborate on a remote project and guide you to making your first pull request.
But for now do enjoy your baby steps, one step at a time. Cheers!!!
Reference: Fundamental of git and Github by MindOrks